

*This post may contain affiliate links. That means I may earn a small commission from qualifying purchases or sign-ups at certainly no additional cost to you! Thanks!*
Do you add affiliate disclosures before the first paragraph of your every blog post, one by one?
Back then, I manually add them to the top-most part of my blog posts, too.
What’s an affiliate disclosure?
If you’re an affiliate marketer, you must know that FTC policies require clear and concise disclosures about your affiliate links.
Affiliate disclosures ensure that your customers know you’re receiving compensation or any payment-in-kind once they purchase through your links and recommendations. It’s to protect consumers and avoid deceptive advertising.
That said, your affiliate disclosure must be highly visible. Most bloggers place their disclosures before the affiliate link or before their content.
With the plugin I’m about to share, you don’t need to manually add these texts anymore. There’s an easier way to automatically post them on your entire blog website.
How to Add Automatic Affiliate Disclosure on WordPress Post in 5 Steps
Here are 5 easy steps to use Ad Inserter for your disclosure statement.
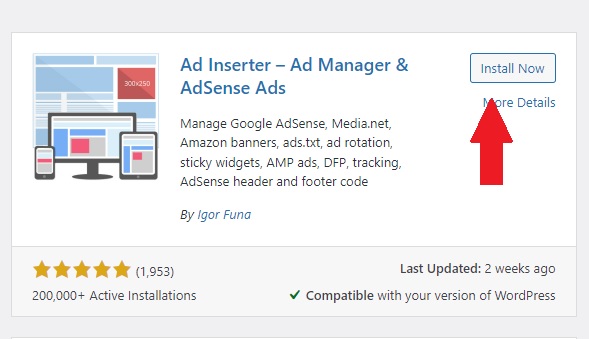
1. Install Ad Inserter Plugin
On your WordPress dashboard, hover on Plugins > Click Add New
Search the “Ad Inserter” plugin > Install > Activate.
2. Setting Up
Click on Settings so you can start setting up your disclosure statement.

3. Enter your Disclosure Text
Upon clicking the settings, this block will appear. Enter your disclosure text here.
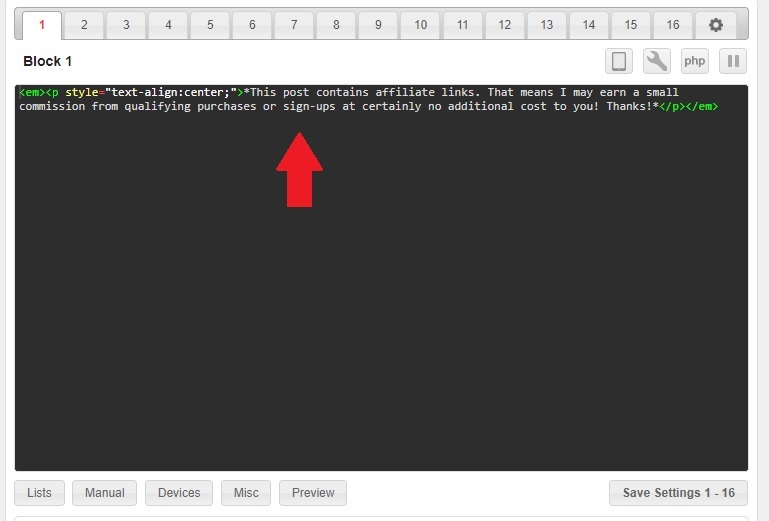
You can copy my disclosure here and paste it on your Ad Inserter block.
<em><p style=”text-align:center;”>*This post contains affiliate links. That means I may earn a small commission from qualifying purchases or sign-ups at certainly no additional cost to you! Thanks!*</p></em>
You could also add these codes to increase or decrease your font size:
For smaller font:
<font size=”-1″> text here </font>
For larger font:
<font size=”+1″> text here </font>
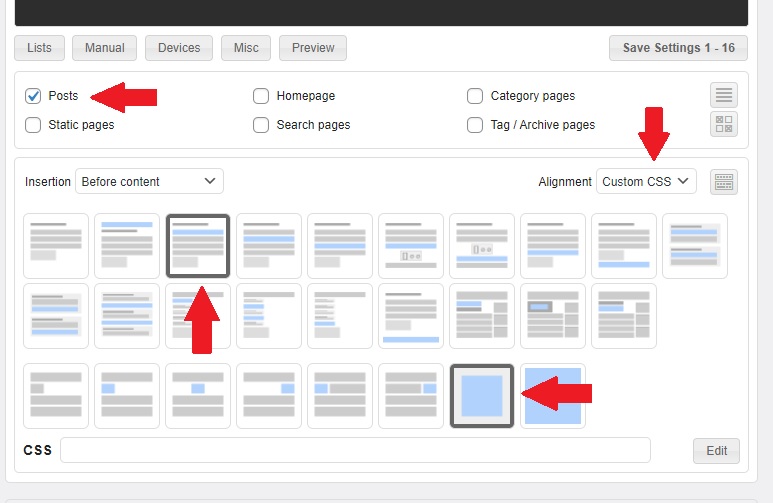
4. Set the location of your Disclosure Text
I place my disclosure texts before the content.
But you could also opt to add it in other locations where it’s highly visible to readers.
You can follow the settings I use below:
5. Click Save
Don’t forget to click Save Settings.
Refresh your blog to see what your disclosure statement looks like.
If you followed my settings, your disclosure must be located right before the content.
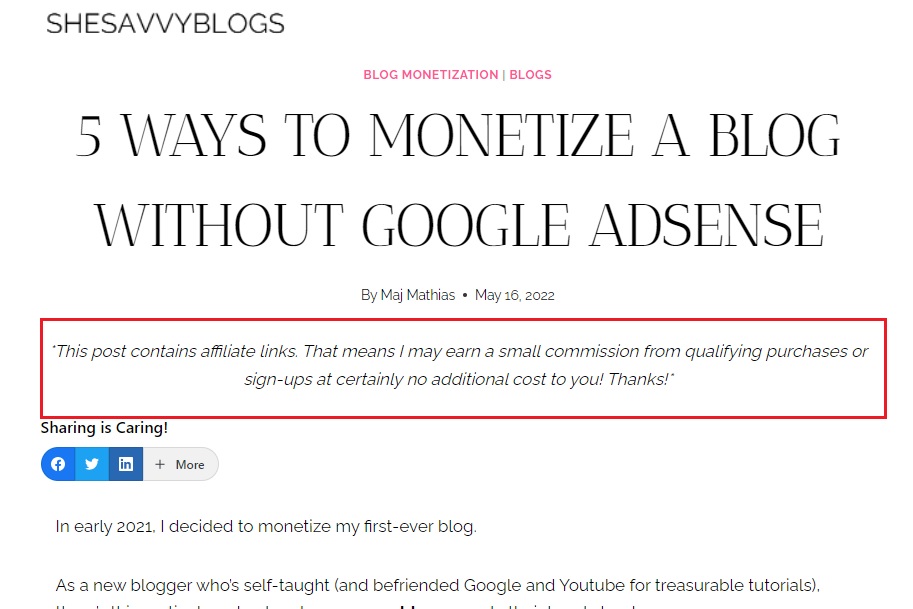
Looks clean and readable, right? Ad Inserter is responsive to mobiles, too.
There you go. Hope you enjoyed this quick tutorial and saves you time on adding disclosure texts!
BLOGGING RESOURCES I RECOMMEND:
Grammarly – Detects misspelled words and grammatical errors. It gives your piece an overall performance score based on correctness, clarity, engagement, and the delivery of your blog. All free!
Ezoic – Aside from ad monetization, Ezoic also offers SEO, Analytics, and Site Speed tools. With Ezoic, my ad revenue increased 23x more than Google Adsense. Thankfully, they now offer an Access Now Program that accepts new blog websites with a minimum of zero – again – zero traffic!